Tag: diy

Pumpkin Patch Journal Entry No. 3
Fall sweetness on this Saturday that included cheering on my sisters at their soccer games, picking out pumpkins and eating pizza. We started off the morning by packing a picnic lunch, bundling up and grabbing blankets and chairs for the soccer game. Then we ran out the door, late, which is typical for us, into the cold October morning.
We had a crazy morning driving from game to game, Sammie lost and Ella won. After that we headed to the pumpkin patch to pick out our pumpkins and grab some fresh squash. Sammie spent the most time looking for the biggest pumpkin she could find. Eventually she decided on one that was the farthest from our wagon and because she couldn’t lift it she rolled it across the entire patch and dropped it in the wagon. Once everyone found their pumpkins we loaded them into the car and headed home.
It was a beautiful autumn day and it was spent in some of my favorite ways.


Do It Yourself Fall Candle Decor
October has rolled around and the seasonal craziness has ensued, everything is pumpkin and spiced, everyone has leaves hanging on the walls and Bath and Body Works has once again relaunched all their fall candles. I am a huge sucker for the fall and winter candles, not only the smell of them but the ambience of having them burn around the house. As I have not been able to purchase and BB&W candles yet this year I decided to stop by Walmart and pick up some two dollar fall candles. They may not be as strongly scented but they work quite well in small spaces such as my room. The big downfall of these candles is unlike the BB&W candles they aren’t very pretty. Which leads me to today’s DIY, Do It Yourself Fall Candle Decor. These super simple candles don’t even look like they are from Walmart and are an easy way to decorate your space.

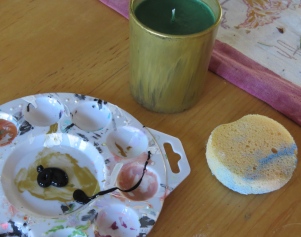
Removing the Stickers:
You are going to want to start this DIY by removing all the stickers from the candles. The ones from Walmart came off without too much of a fight but if you are having trouble all you need is baking soda, warm water and a sponge. This will remove the sticker and any of the residue it leaves behind.
Twig Candle

First you are going to collect a bunch of twigs from my yard and cut them all down in to even lengths. This DIY works best if you use sticks of varying thicknesses and heights to give it that organic look. Now, one by one, you just hot glue the twigs on to your 2 dollar candle. You can do this with multiple candles or on empty jars to create a super cute vase. Voila your Walmart candle now looks like you spent at least 5 bucks

Gold and Black Candle

This DIY is pretty straight forward but I love the way this one turned out. You will need gold paint, black paint, a paint brush and a sponge. I started by painting the candle with the gold, i made sure it wasn’t opaque because I liked that look. After the gold paint dries lightly sponge on the black building it as you go to create this ombre black/gold candle. I can see this one loking super cool when it burns down.
And thats it! You can do this with most cheap candles you buy from Walmart or Rite Aid or wherever and it is quick and easy and so FALL.


Thanks for reading


Blessings
-Hanna Caroline
